How To Troubleshoot Poor Print Quality Of HP Deskjet 3631
Updated on
Do you find the quality of your prints from your HP Deskjet 3631 printer unsatisfactory? Let’s help you improve it using the troubleshooting methods here.
HP printer 3631 is a small multifunction wireless printer that you can buy at around $30. It is easy to set up, quiet, and is perfect for small spaces. It also doesn’t jam easily and most users are satisfied with its performance. For users who love printing quality graphics or photos, this printer can give you clear prints and non-bleeding color prints at a maximum speed of 6 ppm.
With its affordability and simplicity, it is a good printer that would be perfect for your basic printing needs. But let’s admit it. You will always encounter problems with your printer regardless of how perfect it is. Poor print quality is among the common problems that users run into.
So if you are looking for ways on how to improve print quality without spending a lot of money, you’re in the right place! Check out our compiled solutions here on how to do this!
Before we proceed to the solutions on how to fix poor print quality, we have listed the possible reasons why this happens so you can avoid this problem again in the future.
We know that one of the reasons why you bought your printer is to achieve quality prints as much as possible. So when your printer ends up giving you unsatisfactory prints, it can be really annoying because you’ve already spent a lot of money on it. But do you know why your printer suddenly produces awful prints when it was doing fine when you last used it? Below might be the reasons why:
You are not using genuine HP printheads and ink cartridges.
You have loaded the wrong type of paper that is not suitable for your application.
You have set incorrect print settings.
Your ink cartridges are running out of ink.
Misaligned ink cartridges (this usually happens when you have installed new ink cartridges).
Dirty or clogged ink nozzles and metal contacts.
Your ink cartridges might be incompatible with your printer or they are damaged.
All of the above reasons can cause several print quality issues including the following issues:
6 Methods to Fix Poor Print Quality On Your HP Printer
Below are the methods to troubleshoot HP print quality problems. Make sure to do the first methods first before proceeding to the next ones.
Method 1. Check Compatibility of the Cartridges (For Newly-Replaced Ink Cartridges)
Using incompatible ink cartridges on your printer can cause it to have a hard time printing properly. Make sure that you use genuine HP ink cartridges only. HP gives you the option to automatically reorder cartridges once your printer runs out of ink through a monthly subscription.
This sounds great, right? However, take note that among the common user concerns with the HP 3631 printer is the need to replace ink cartridges every month even if they are not printing regularly. Thus, they end up spending more on ink cartridges than on printer maintenance.
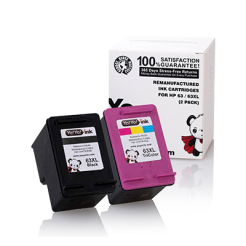
So if you don’t want to waste money on expensive ink cartridges, you can buy from third-party ink cartridge manufacturers. However, make sure that you are buying from a trustworthy supplier like YoyoInk. We offer high-quality HP Deskjet 3631 printer ink cartridges that come with a 100% money-back guarantee and a 2-year warranty.
Method 2. Make Sure That Your Cartridges Are Not Low on Ink
Check the estimated ink levels of your cartridges and replace the ones that are low on ink. If you don’t know how to check the ink level, follow the steps below:
Search your printer’s model on Windows.
Click on it from the results to open the HP Printer Assistant window.
Click on the Estimated Ink Levels tab.
Examine the ink levels and replace the cartridge that is running out of ink. Make sure that you remove the protective tapes of the ink cartridges and that they snap perfectly into their assigned slots. An alignment page will be printed afterward.
After replacing, align the ink cartridges:
Place the printed alignment page on the scanner.
Close the lid and then press either the black or color Copy button from your printer’s control panel.
Wait for the alignment process to complete.
Method 3. Make Sure You Are Using Paper That Is Appropriate for Your Project
Incorrect paper type can cause streaks, lines, and warping on your prints. Follow the guideline below for selecting the right paper for your project:
Check the printing side of the paper and make sure that it is the one facing up.
Use clean paper. It shouldn’t be curled or wrinkled.
If you are using photo paper, load up to 15 sheets only. When you’re not using them, put them back on their original packaging.
For text documents, use plain ColorLok paper.
For photos and graphics, HP Advanced Photo Paper is recommended.
Method 4. Choose the Correct Print Settings
You might have chosen the wrong print settings like selecting Draft mode for print quality. Double-check your settings and adjust the following as necessary:
Black and White
Paper Size
Paper Quality
Paper Type
You will find these settings on the print window when you press Ctrl+P on a test file you want to print.
Method 5. Examining Color Block Defects on the Print Quality Diagnostic Page
This is where HP Deskjet 3631 setup gets more challenging.
First, load your printer with clean plain paper.
Step 1. Printing a Print Quality Diagnostics Page
In Windows
Open the HP Printer Assistant window again.
Click on Maintain Your Printer under the Print section.
Go to Device Services and then click on Print Quality Diagnostics Page.
In macOS
Go to the Apple menu, click on System Preferences, and then Printers & Scanners.
Look for your printer, click on it and then go to Open Print Queue.
Click Settings or Printer Setup, then Utility > Open Printer Utility > Print Quality Diagnostic.
Step 2. Examining Color Block Defects
Check for faded, missing, or white lines on the color blocks. If any exists, proceed to the next step. If there aren’t, proceed to Method 6.
Step 3. Clean Ink Cartridges
Load your printer with clean plain paper before proceeding.
In Windows
Open HP Printer Assistant then go to Maintain Your Printer > Device Services > Clean Ink Cartridges. This will print a quality diagnostic page again.
In macOS
From the Settings or Printer Setup window of your printer, click Utility > Open Printer Utility > Clean Printheads. Wait for the cleaning process to complete. Once done, click Print to print a quality diagnostic page.
Examine the page and click Done if it has an acceptable quality. Otherwise, click on Second-level Clean.
Perform the cleaning process multiple times for badly clogged printheads. Allow a 30-minute gap for each cleaning process. If you still find the quality to be unacceptable, proceed to the succeeding method.
Method 6. Determine if the Ink Nozzles Are Clogged
Step 1. Examine the Defects on the Green Color Block and Alignment Lines
Get the Print Quality Diagnostic page from earlier and check the following:
The alignment lines should be connected and straight
There should be no white gaps or dark lines in the green block
If you didn’t find the above defects, your ink cartridges are working fine and you can stop troubleshooting here. Is the print quality still unacceptable? If you are printing an image, check if its resolution is high. Or else, it might come out blurry.
Proceed to Step 2 if you find defects on the green color block and alignment lines.
Step 2. Align Your Printer
Load your printer with clean white paper.
In Windows
Open HP Printer Assistant > Maintain Your Printer > Device Services > Align Ink Cartridges.
Scan the printed alignment page to align the ink cartridges.
In macOS
Click on your printer from Printers & Scanners and then click on Open Print Queue.
Click Settings or Printer Setup, then Utility > Open Printer Utility > Align.
Do the following steps for both Windows and macOS:
After the alignment is finished, print a new quality diagnostic page.
Examine the page again and if you still see any smear or track mark, proceed to the next step. If you are already satisfied with the quality, stop troubleshooting. However, if the quality is still poor and you don’t see any defects, it’s time to replace your ink cartridges. They might be defective.
Step 3. Manually Cleaning Clogged Ink Nozzles
Prepare the following:
Distilled water
Lint-free cloth
Cotton swabs
Remove one ink cartridge from your printer. Hold it by its sides. Do not touch any sensitive parts of the ink cartridge or you might damage it.
Moisten the link-free cloth or cotton swab using distilled water. Squeeze excess water.
Clean the area around the ink nozzle plate only. Do NOT touch the ink nozzle plate.
Wipe the cleaned area with a dry cotton swab before reinstalling the ink cartridge.
Repeat steps 2-5 to the other ink cartridge.
Try printing again and see if this resolves your problem.
Wrapping Up
Troubleshooting your HP printer might turn out to be a hassle if the cause of the problem is worse than you expected. But we hope that this guide was able to help you solve your problem. Also, to avoid other problems, make sure that your HP 3631 driver is always up to date. For more troubleshooting guides, you can read these blogs too:
We use cookies to ensure that we give you the best experience on our website. If you continue to use this site we will assume that you are happy with it. Ok


 Live Chat